| Word Tips |
|
[Last updated: 31-Jul-2023]
This page describes a few Microsoft (MS) Word tips/actions that can improved the quality, appearance and readability of documents. By adopting them, they can also help maintain consistency across a documentation set.
Although many companies provide MS Word training sessions for their employees, there are several features of Word that they regard as only being for the Advanced User. Some of them are so simple that I believe they shoud be included in the Basic training course. Thus, a number of these so-called "advanced" features have been brought together on this page, to help produce high-quality documents.
Note: Most of the images in the body of this page were based on Word 2010. However, they are gradually being replaced with a 2016 version (where requred) when I remember and find the time. Additionally, the sizes of some images were too large for the page's design, so for relative and consistency purposes, all images are displayed at 75% of their actual size.
Once a Word document has been saved and closed (for example, at the end of the day}, there is a quick and easy way to resume editing the document at the location where the last edit was made: Once the document has opened, press <Shift> + <F5> as the very first action.
When a document is saved and closed, Word usually places an invisible bookmark at the point where the cursor was last located. By using the <Shift> + <F5> key combination, editing can continue. However, later versions of Word (Word 365) sometimes provide an indicator (on the right-hand side of the window), where the last edit was made.
Word uses paragraph marks (¶) to control the formatting characteristics of a document. These marks contain the characteristics (styles, etc.) of the preceding object; be it a list item, paragraph or heading. Each paragraph mark can contain up to thirty different formatting commands for the screen and printer.
When copying existing text from one document to another (when both can have different styles and templates), it is important that the new document is not "contaminated" by styles from the original document. Unfortunately, contamination can easily occur when copying the paragraph marks; see Copying and Pasting Text.
As a default, formatting marks are usually invisible. However, it is useful (and highly recommended) to have them displayed. In doing so, they can reveal additional (and sometimes interesting) information about a document; for example, wasted spaces, tab spaces and line feeds that are unnecessary. Some authors do not like them displayed, because, to some, it makes the document look cluttered. However, an author can be selective of what marks are (are not) displayed.
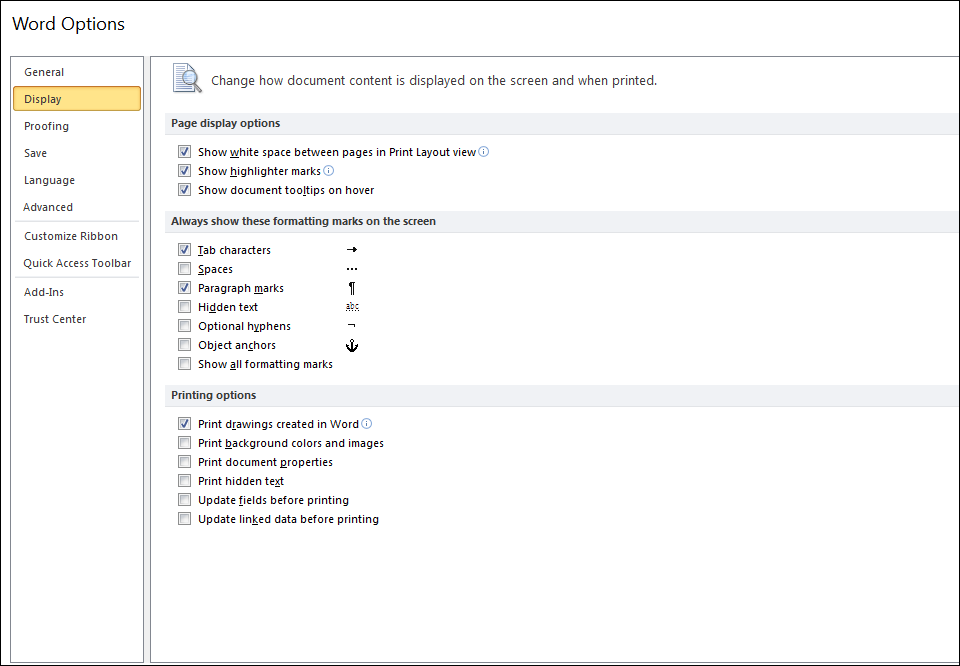
Figure 1: Formatting Marks
There is a quicker way to display the formatting marks: Under the Home tab, click the paragraph symbol (¶) in the Paragraph group; see Figure 2.
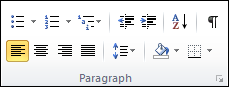
Figure 2: Paragraph Group
However, the disadvantage of using this action is that it turns on ALL formatting marks, including placing a dot in every space, which·can·make·the·document·look·very·cluttered·and·difficult·to·read.

Similar to formatting marks, text boundaries show when objects (for example, paragraphs and images) are out of alignment. Similar to formatting marks, text boundaries show interesting information; for example, when objects (paragraphs and images) are out of alignment, and sometimes extend off the page! Switching text boundaries ON shows the exact limits of how and where the page layout settings are configured.
Figure 3: Text Boundaries
With the text boundaries now showing, the margin settings are adjusted by clicking the little arrow icon, in the bottom right-hand corner of the Page Setup group, under the Page Layout tab; see Figure 4.
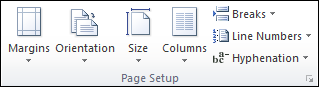
Figure 4: The Page Layout Group
When modifying the page’s text boundaries, do not set the Top, Bottom, Left and Right margins to zero; most printers are unable to print to the page’s edge. Unless otherwise stated, a suggested, and convenient, distance is 2.5 cm for the Top and Bottom margins and 2.0 cm for the Left and Right margins; see Figure 5.
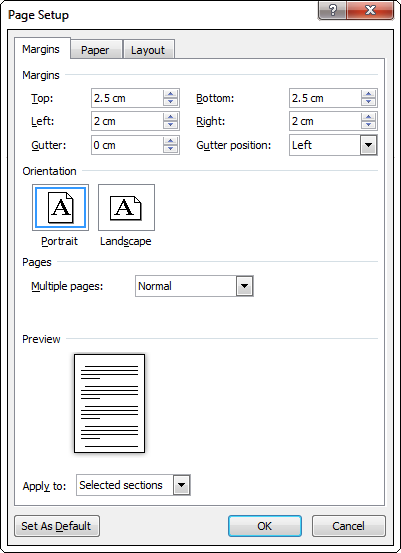
Figure 5: Page Setup
Little appears to be known about Word’s text indentation, so many authors use the <Tab> key or the <Space Bar> to move or position text to the right. This action can cause additional editing maintenance if the document is modified at a later date! Therefore, do not use these two keys to move text to the right. Word uses proportional spacing for its most common fonts, so the <Space Bar> does not provide consistent or representative spacing. Instead:

Figure 6: Paragraph Indent and Spacing
In the Indentation group, a value of 0 cm means that the text aligns with the text boundary. To indent the text, set the Left value to 0.5 cm, 1.0 cm, or the required distance from the left-hand margin.
Note: Only set a Right value if there is a specific requirement to. Also, ensure the Special value is set to None for normal paragraphs.
See also Adjust indents and spacing (Microsoft Office Support).
Do not use the <Enter> key to increase the white space between objects (for example, paragraphs). Instead, set all objects (except Headings) with a vertical spacing of 0 pt Before and 6 pt After (in the Spacing section of Figure 6). These values provide an adequate amount of white space between objects, without it being too excessive.
See also Adjust indents and spacing (Microsoft Office Support).
Now that paragraph marks (¶) have been explained (in Formatting Controls), there are a few things to be aware of when copying and pasting text between documents.
As the flu virus (or Coronavirus (Covid-19)) can be passed amongst humans, unwanted styles can be passed from document to document by pasting, and via the default template file (Normal.dot/dotx).
If the source document has origins from an unknown (or 'alien') location, it is quite possible that it may contain, or have become infected (or contaminated) with, unwanted styles. Thus, if the Paragraph mark is copied from the source document and pasted into the target document, the template governing the target document could equally become infected (or contaminated) with those unwanted styles.
There are two ways of copying (or moving) text between documents:
Inserting Text using Paste and
Inserting Text using Paste Special.
For both processes, navigate to the text to copy in the source document and ensure paragraph marks are showing.
Inserting Text using Paste
This is the most common process and quickest option [but can give rise to problems if paragraph marks are included]:
In most situations when selecting text, Word automatically includes the paragraph mark at the end of a sentence. To avoid copying the paragraph mark, position the cursor at the beginning of the text to copy, hold down the <Shift> key and select the required text using appropriate arrow keys: ç, è, é and ê.
Admittedly, this process could take some time (depending on the size of the document), but it reduces the risk of copying unwanted styles.
If the paragraph mark is inadvertently included in the Copy phase,
the destination document 'could' become infected with the style from
the source document (when the copied text is pasted into that document).
However, take note of the next item.
A small pane opens, with a number of Paste Options; see Figure 7. Select the last option: Keep Text Only (T). This pastes the copied text into the document without any formatting characteristics, ensuring the pasted text adopts the destination document's formatting style.

Figure 7: Paste Options
If the pasted text does not resemble the destination format, use the Format Painter to reformat the copied text.
Inserting Text using Paste Special
This is a less common approach, but pastes text without any formatting associated with it.
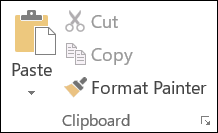
Figure 8: Clipboard Group

Figure 9: Paste as Unformatted Text
The Spike is an extended clipboard feature of Microsoft Word. It allows you to remove two or more items (such as text or graphics) from non-adjacent locations in a Word document, and then insert the items as a group in a new location or document. The items remain in the Spike so you can insert them repeatedly. To add a different set of items to the Spike, you must first empty the Spike's contents.
To move items to and from the Spike:
The Format Painter applies formatting from one object to another. To use the Format Painter:
Note: To format multiple objects with the same style, double-click the Format Painter icon. This allows the cursor to be used numerous times. To turn the feature OFF, either click the Format Painter icon again, or press the <Esc> key.
To avoid having a document full of markup changes, ensure Track Changes are turned OFF when creating:
Once the new document has been successfully created, there is a probability that it needs to be updated. At this point, Track Changes need to be turned ON. Track change controls are located in the Tracking and Changes groups (see Figure 10), under the Review tab.
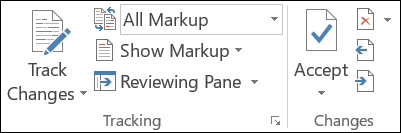
Figure 10: The Tracking and Changes Group
Some companies choose to indicate changes in their documents by having change bars printed in the page margins (indicating the location of a change), but without showing the actual track changes (that have previously been accepted). To create this effect:
In earlier versions of Word, the Track Change Options dialogue box is accessed by clicking Track Changes and selecting Change Tracking Options....
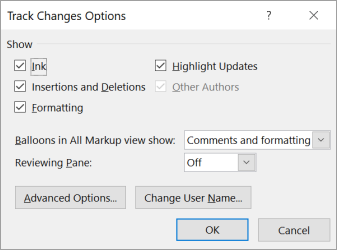
Figure 11: The Track Changes Options
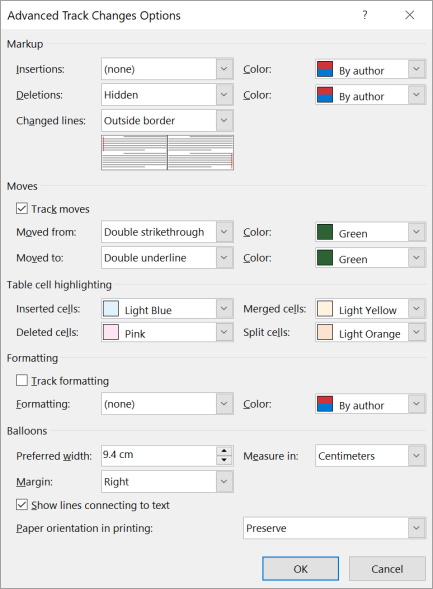
Figure 12: The Advanced Track Changes Options
Voila! the document should now show change bars in the margins (where approprite), and no markup text.
See also How to print change bars only (Microsoft Community) and/or How to print change bars but not the edit detail in Word 2013; this also applies to the current version of Microsoft Word 365.
Using this little-publicised, but useful feature, can save a lot of annoying confusion. Sometimes, short links, for example, "Figure 3", are split at the end of a line; i.e., "Figure" at the end of the line and "3" at the beginning of the next line. This situation can be avoided by inserting a Non-Breaking SPace (NBSP - HTML code: ).
To apply an NBSP to, for example, Figure 12:
The key combination effectively glues Figure and 12 together, so that they are never split. If there is no room for both of them at the end of a line, both words (Figure 12) are positioned on the next line.
Similarly, the non-breaking hyphen (HTML code ‑) is used to define a hyphen character (‑) that does not break into a new line. See HTML Entities
How many times have you seen a heading (be it for text or a table) at the bottom of a page and the rest of the text (or table) is on the next page? This scenario can be easily rectified.
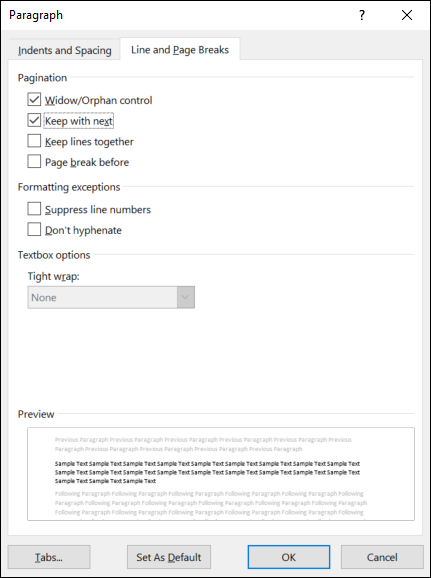
Figure 13: Keep with Next
To ensure tables look aesthetically pleasing to the eye, and have a consistent look about them, apply the following options.
Note: When the cursor is placed anywhere inside a table, two additional tabs (Design and Layout) appear under a new ‘parent’ Table Tools group.
However, if the vertical size (height) of the table row is greater than the whole page, consider splitting the row into logical segments (paragraphs). Also, for exceptions like this, the Allow rows to break across pages option may need to be selected.
Table 1 represents the Keep with next option, when the caption is ‘glued’ to the table heading, which itself is ‘glued’ to the first table row; indicated by the small black squares (■) (when formatting symbols are displayed). This means that if there is not enough space for all ‘glued’ items to exist at the bottom of a page, Word places all three items (in this example) on the next page.
| ■ Column 1 Heading (Width = 40%) | Column 2 Heading (Width = 30%) | Column 3 Heading (Width = 30%) |
|---|---|---|
| Lorem ipsum dolor sit amet, consectetur adipiscing elit. Integer nec mi orci. | Duis in varius quam, ac dictum risus. Curabitur laoreet orci at neque mattis, et consequat sem tincidunt. | Mauris vulputate, nisl quis placerat placerat, justo odio aliquam libero, et euismod mi turpis id nisi. |
| Duis sit amet magna quis nisl semper semper. Nunc nec mi ac odio viverra fermentum. | Nunc fermentum, magna accumsan blandit pretium, ligula eros dignissim risus. | Nulla pharetra accumsan libero, et suscipit nunc feugiat in. |
| Nulla pharetra iaculis eros eget feugiat. Fusce facilisis blandit metus vel rutrum. Vivamus et sodales dolor. Sed ut lacus justo. Nam vel augue egestas diam tincidunt egestas. | Duis et nisl ut turpis ultrices mattis ut eget arcu. Class aptent taciti sociosqu ad litora torquent. | Sed suscipit mi scelerisque elit ultrices scelerisque. Vestibulum orci urna. |
| Praesent eu quam quis libero cursus ultricies. Nam convallis fringilla nunc vitae dapibus. Etiam luctus, eros eleifend facilisis luctus, pellentesque iaculis nisl nibh eget eros. | Vestibulum aliquam nisl fringilla nibh gravida, et hendrerit nulla pellentesque. Nunc gravida porta nunc non hendrerit. Sed dolor ante, posuere sit amet nisl a, ultricies posuere dolor. | Aliquam accumsan ac nisi mattis tincidunt. Quisque ac risus et eros bibendum. |
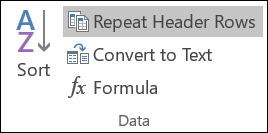
Figure 15: 'Repeat Header Rows' in the Data Group
Note: It appears that this anomaly has (at last!) been corrected in Word 2013 and later: i.e., table borders now align with the text boundaries!
If using a verion of Word prior to Word 2013, select the table, click Properties (in the Tables group, under the Layout tab). Under the Table tab, set the Indent from left value to approximately 0.2 cm greater than the Horizontal Indentation.
With reference to Figure 16, paragraphs before and after the table had an initial Indent from left setting of 1.5 cm. Therefore, to set the table border in-line with the text, the Indent from left value has been set to 1.7 cm (1.5 cm + 0.2 cm).
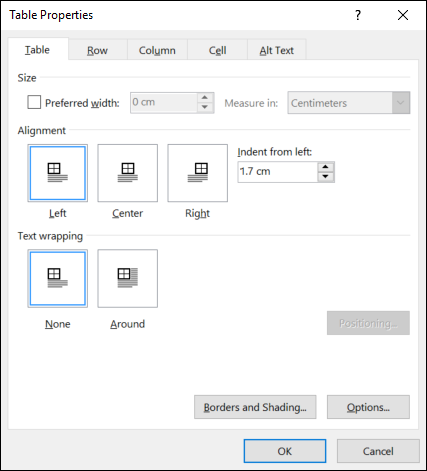
Figure 16: Table Properties
To adjust column widths, select a table column by right-clicking the mouse and selecting Table Properties; a Tables Properties pane opens (see Figure 17).
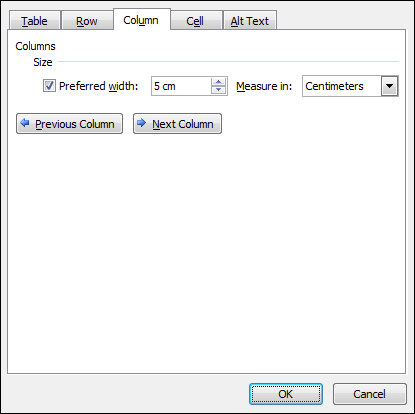
Figure 17: Table Column Widths
Adjust the Preferred width value to the required width; 2 cms as in the previous example. In a metric environment, ensure Centimetres (the Americans can’t spell!) is showing in the Measure in field.
Adjust the selected table column's width to the nearest 0.1 cm. Move to the remaining columns (using the Previous Column and/or Next Column buttons). If the columns contain a lot of information, consider adjusting the columns, so that the table is full-width. This ensures that the combined width of the columns fit exactly within the text boundaries.
However, do not create columns that are too narrow; especially when they contain automatic numbering. I have seen unwanted – and unseen - text in a cell, where the column width was too narrow and the full number was not displayed. For columns containing numbers (for example, 6.3.10, set the column width to 2 cm).
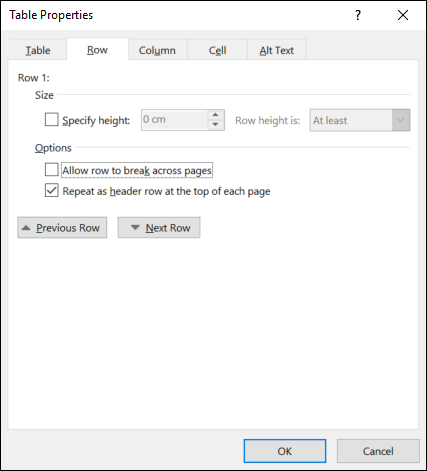
Figure 18: Table Row Properties
Deselect the Allow rows to break across pages option, as shown in Figure 18. With this option deselected, rows are NOT split across page boundaries, and thus the full context of the row text is maintained; avoiding any confusion and misunderstanding!
If, however, this option is selected (usually the default), one or two words, a phrase, or even a single question/exclamation mark (if separated from the text by a space (as written in French)), can appear on the next page, on its own; which can be totally confusing and meaningless!
Note: Unless there is a specific reason to set the height of a row, let Word set the row height; i.e., keep the Specify Height value blank, particularly if the text's Spacing settings (Before and After) are set, for example, to 3 points; see Figure 19.
In the Spacing section of the Paragraph pane (Figure 19), set a vertical spacing of 3 pt Before and 3 pt After. [The nearest equivalent of these spacing settings (padding: 7.5px in HTML) has been applied to Table 1.]
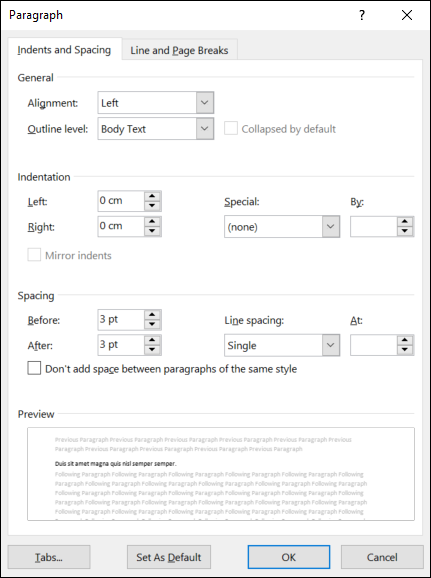
Figure 19: Paragraph Spacing
Apply shading to the table header, to improve the overall appearance of the table.
Select the header, right-click and select Borders and Shading...
or
In the Table Styles group, under the Design tab, click
Borders, and in the dropdown menu, click Borders and
Shading from the dropdown list. Finally, click the Shading
tab; see Figure 20.
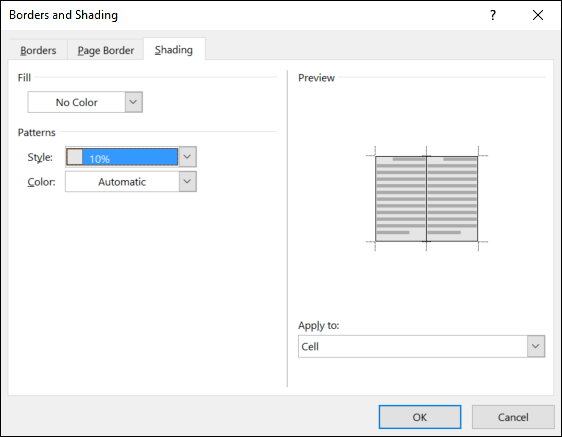
Figure 20: Shading
From the Style dropdown menu, select 10% as the style of shading. This provides an adequate amount of grey colouring to differentiate the table header from the rest of the table’s data rows, without being too bold - and consuming excessive printer toner!
Also, if cross-references are used and a table is moved to another part of the document, any references to it are automatically updated - providing the whole document is updated, as follows:
To update the document, excluding the Table of Contents (TOC):
To apply a caption to a table, select the whole table, right-click inside the table and select Insert Caption. Reformat the caption (as required), as Microsoft’s default style for a table caption may be too small for your particular requirements!
Don't forget to apply the Keep with next option to the caption; see Separated Paragraph Headings.
Microsoft Word can produce simple mathematical functions, such as adding and multiplication. Refer to the following links for more information:
Using formulæ in a table
Using the '=SUM()' command (at WordMVP)
Images come in a variety of formats, namely: .png (Portable Network Graphics), .jpg/.jpeg (Joint Photographic Experts Group), .gif (Graphics Interchange Format) and .bmp (Windows Bitmap).
Consider the following formats when inserting images into documents:
Note: Avoid using .bmp files! This format is uncompressed and thus bloats a document. [It resembles Gruyere cheese - it is full of gaps!] Convert a .bmp file to one of the other formats.
Based on the last bullet item, do not paste <Print Screen> (or <Prt Scr>) images into documents, as they effectively have the Bitmap format. Instead, use the Windows Snipping Tool to capture the required pane, window or part of the screen, save the resulting image as a .png image, and then insert the image into the document.
If any .bmp files exist in the document, it is wise to convert them, by copying and pasting them into the Windows Paint application (or your favourite image editor), and save them (for example) in the .png format, before inserting the new, smaller image into the document.
Note: For consistency purposes, when inserting images into a document, ensure that they are all illustrated at the same size. Although all images on this page have been inserted full-size (100%), they have been reduced to 75% of their original size. This shows the true relative sizes between the various images. For example, it would look totally wrong if Figure 8 was produced the same size as Figure 9! They are not the same size! Besides, if an image similar to Figure 1 was illustrated full-size, it would extent outside the page boundaries (paper version) and look over-scaled on a web page.
Do not enter double spaces between sentences, as they can lead to both incorrect pagination and spacing. Modern word prosessing applications (for example, MS Word) use proportional spacing for most of their fonts.
P.S. Typewriters are a thing of the past (last century)!!!
When all editing is complete, the author should pass the document to the reviewer(s).
Note: If there are two or more reviewers (and there is no electronic document management system), the review process must define who is to accept the changes (once all review comments have been discussed and agreed), and define whether to review in series or in parallel:
The in series process is better for the author, as there is only one document in which to accept/reject the changes. Also, the reviewers may provide additional modifications/comments to any previous reviewer comments. The downside of this process is that the reviewing process can take longer as the document is passed from one reviewer to the next reviewer.
If the in parallel process is chosen, the author must be given enough time to review the mark-up comments in all reviewed documents.
If there are many modifications/comments, they can be hidden by clicking All Markup and selecting No Markup, in the Tracking group, under the Review tab; see Figure 10 (in the Track Changes section). Supressing the markup modifications and comments, produces a clean-looking document. They still exist within the document, but are hidden. When the reviewing process is completed, the reviewed version could be saved as "file_name_markup.docx".
Accept the changes by clicking Accept in the Changes group (see Figure 10), and selecting Accept All Changes. If preferred, changes can be accepted one-by-one, by clicking Accept and selecting Accept and Move to Next from the dropdown menu. This version might be saved simply as "file_name.docx" to differentiate it from the marked-up version.
The very last (and important) action to be done to a document is to update the Table of Contents (TOC).
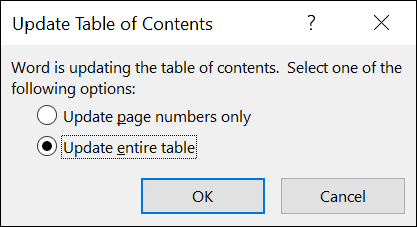
Figure 21: Update the Complete Table of Contents
Updating the TOC can show if any objects have been formatted incorrectly. For example, if, in the TOC, you see text that you know is NOT a heading, locate the text and reformat as required, using the Format Painter.
With a keen eye, you can also see headings that have unwanted spaces after the text. Remove them and update the TOC again.
There is a lot of confusion surrounding the word template when
it comes to documentation. Microsoft’s definition is:
A file or files that contain the structure and tools for shaping such
elements as the style and page layout of finished files.
From a User point-of-view, a document template is usually a blank
document, containing fields or paragraphs that require populating.
From a System point-of-view, a document template refers to Word’s
system-wide Normal.dot/dotx file.
The latter definition is descried as follows:
A template contains specific styles, whether they are from Microsoft, or created elsewhere. Implementing a template (or set of templates) can help:
Having a set of documents with a common template (for all similar types of document) also makes copying text between the documents easier, as the documents share the same styles. A common template is also better for the user; he/she can switch from one document to another without having to worry about changing styles; as all styles are common between the documents.
Thus, by using a bespoke template, there is less risk of a document becoming 'contaminated' with extraneous styles, and potentially corrupting future documents. This is especially relevant if the origin of a document is not known.
Note: Applying a global bespoke template could be a problem for the IT department; for example, deciding which users require the template and those that don't! If installed, would the user know of its presence and how to use it? Would there be (regular) updates?
Suggested Template Settings: The following list is not a de faco rule. It simply contains my suggestions that can assist in maintaining clarity and consistency.
For lists that extend into double digited items, increase these distances, for example, by starting at 0.5 cm or 1.0 cm.
To see a list of bullet styles, refer to List Style
Types.
Note: This list (at w3schools) shows how a variety of bullet
styles can be created on a web page (HTML coding).
This is a feature of MS Word that produces a specific style when the Enter key is pressed. For example, the most common object to follow a heading is a paragraph. This can be an automatic action, if the template style is set up correctly.
Figure 22 illustrates an example of the Style for following paragraph setting. In this template style example, a Normal styled paragraph will automatically follow a Style Heading 1 +14 pt when the <Enter> key is pressed.
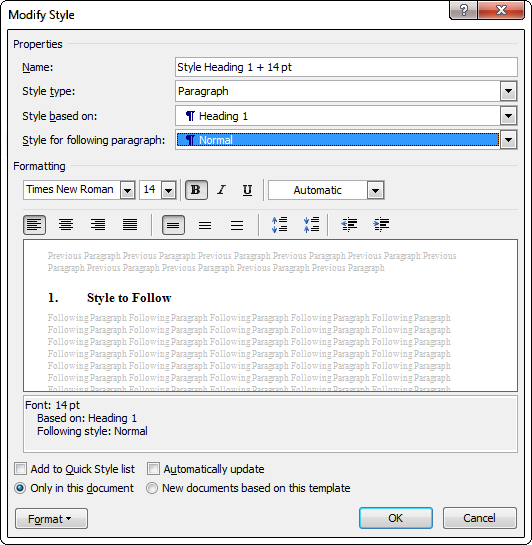
Figure 22: Modify Style
A bookmark in a Word document is an aid to quickly locate certain passages of text. The process of creating a bookmark is as follows:

Figure 23: Insert Bookmark
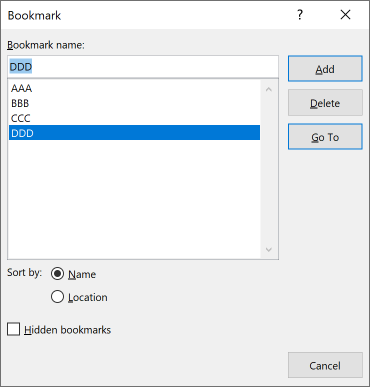
Figure 24: Bookmark Maintenance
Any pre-existing bookmarks (for example, AAA, BBB and CCC) are shown in the centre area of the pane.
Note: Bookmark names do not support spaces, hyphens or slashes. If they exist in the copied text, simply replace them with the underscore character (for example, for Annex 1, enter annex_1).
The bookmark has been created.
Cross-references to headings, figures and tables, etc., are easy to create, making use of bookmarks. However, a document having non-standard headings (for example, Annexes) may not contain bookmarks. Therefore, in order to insert a cross-reference to an Annex heading, create a bookmark for the heading before continuing, as described in the Creating Bookmarks section.
If the bookmark is for an Annex or Appendix, enter the name of the bookmark, with its number - if one exists (but without any spaces); for example, annex_1
Assuming the bookmark exists:
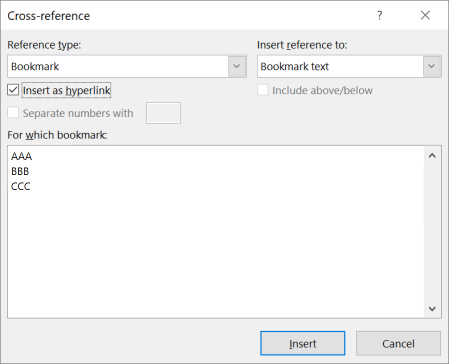
Figure 25: Cross-references
Place the cursor over Annex 1 and the link should be displayed, verifying the existance of a cross-reference. The cross-reference can be copied and pasted as many times throughout the document, if required.
Microsoft introduced a new default font (Calibri) with Word 2007. If, for some reason, the default font needs to be changed, use the following list of actions:
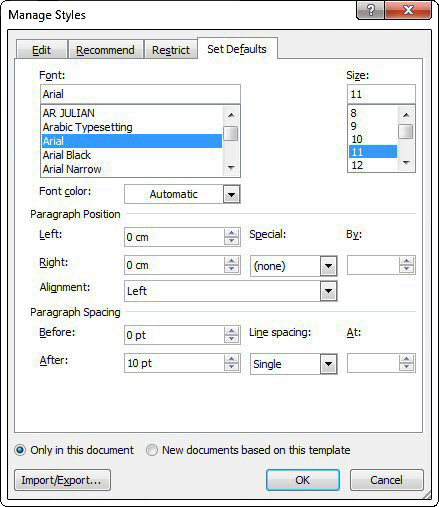
Figure 26: Manage Styles
Normally, Word allows only a one-to-one relationship between footnote references and footnotes. If there is a need to have more than one reference to the same footnote:
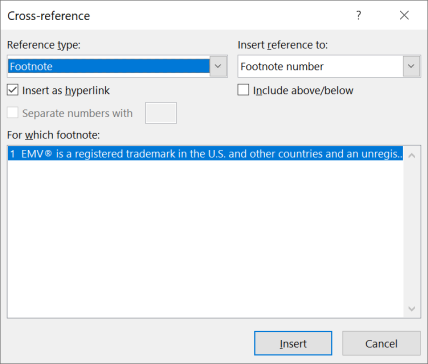
Figure 27: Insert Cross-reference
When working at, or with, companies where a document has been written in one language (for example, English) and may have been modified in another country (for example, France or Italy), a Word document can adopt the local language for part (or all) of the document. Thus, the document may show red wavy underlining, indicating a possible spelling mistake.
Unless there is a requirement to have text in a second language in a document, the document's language can be easily modified, or even added if a language is not showing:
![]()
Figure 28: Word's Status Bar
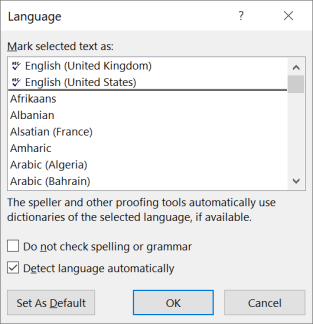
Figure 29: Language Selection
Note: Once the required language has been applied, it is possible that some words may be underlined with a red wavy line. Check that the spelling and langaue are correct. [Any potential grammatical errors are underlined with a blue wavy line.]
After working with several files that have been modified over a period, it can sometimes be difficult to remember and/or locate those files. Fortunatly, there is a solution, depending upon the results required.
All commands refer to the File Explorer Search This PC text box; Figure 30.
![]()
Figure 30: Search This PC
To search for all files modified on a particular date:
datemodified: 01/07/2022
To search for all files modified between two dates:
datemodified: 01/07/2022 .. 12/07/2022
To search for specific files:
filename.htm datemodified: 01/07/2022 .. 12/07/2022
To search for specific files, using wildcard characters - use the question mark (?) for individual characters and the asterisk (*) for multiple characters:
nz????.htm datemodified: 01/07/2022 .. 12/07/2022
or
n*.htm datemodified: 01/07/2022 .. 12/07/2022
This section contains a list of useful web pages (opening in a new tab) that can be used to produce high-quality documents.
 |
Click to reveal a QR Symbol for the Home Page
![]()